A large, permanent wetland 120km north of Innaminka in the arid region of South Australia, Coongie Lakes are fed by a branch of Cooper Creek, together providing water in an otherwise dry landscape.
Coongie Lakes is a national park with camping allowed in restricted areas and campfires allowed in designated spots only. We didn't see any designated campfire spots.
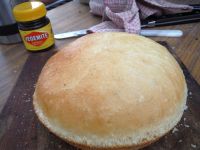
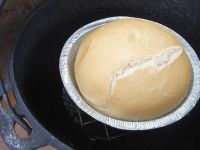
With the need to bake a loaf of bread, usually done in the camp oven in the coals of the campfire, the gas burner was about the best available option.So with a small loaf prepared I placed my home made triffet in the camp oven and preheated it while cutting the loaf in half and oiling a round aluminum foil tray for the loaf.
The regular method is to rake some coals out of the fire, put the camp oven on them and put more coals on top. The loaf would usually fill most of the volume of the camp oven. But with no heat available for the lid of the camp oven and the gas flame being rather severe, the triffet kept the loaf clear of the bottom and allowed an even heat all around the loaf.
It was so pleasing, after 30 minutes with the gas on full, to find a nice crusty loaf, baked evenly right through. We shared the first of two small loaves round the camp as the second small loaf baked, again to perfection.
Like to bake your own fresh bread and eat it hot in a remote area? Read on for a run down on the recipe and method.
Ingredients:
- 2 cups bakers flour
- 1 cup water
- 1 teaspoon yeast
- Half teaspoon salt
Yes, that's it! The best French bread is made with just flour water yeast and salt; nothing else. Add to these ingredients if you wish. Your bread may be different but will be no better.
Method:
Place the flour, yeast and salt in a basin and give it a bit of a mix with a wooden spoon (I use a flat spatula).
Add the water and mix into a rough dough (no need to mix it perfectly), tip the dough onto a floured board and scrape out the bowl. You'll need the bown later. Commence kneading and continue for around 10 minutes, until the dough has taken on a smooth texture. You'll likely need to add a little more flour as you go to prevent the dough sticking to the board and your hands; ooh, it's a messy business!
Oil the mixing bowl, place the dough in it and cover with a plastic bag, placing the bowl in a warm place for a couple of hours till the dough has risen to about twice it's original volume.
Then tip the risen dough onto your lightly floured board and kneed again for a few minutes. This is called knocking down. Much of the air bubbles created by the yeast during fermentation will escape and the loaf will shrink.
Shape the loaf as required and place it in the camp oven or tray as the case may be and allow it to rise again for an hour or so till it has once again expanded to about twice it's volume.
Towards the end of the second rise, preheat the oven. At home, in the fan forced, electric oven, I bake at 200 degrees C for 35 minutes. When campfire baking I try to approximate this.
Here's a tip: When you start the smell the aroma of freshly baked bread wafting around the campfire or in tis case, around the gas ring, give it another few minutes and it will be fully baked. Of course, with the gas ring you have a level of control that is missing with the campfire so you can time the baking.
When a light crust appears on top and the loaf has come away from the sides, it's fully baked. Another indicator is when it sounds hollow when tapped.
Tip out your hot loaf onto your board and carefully cut with a sharp bread knife. If you intend to share it around the camp, with butter melting and dripping down, be sure to get a slice or two yourself, early on, or you'll miss out.


